
Options - Game Display
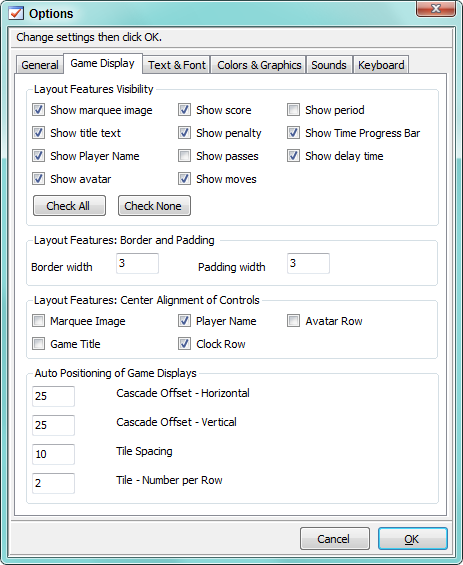
Layout Features Visibility
You can show or hide all of the features on the Game Display except the Player Clock (See Figure 3).
Checking an item will show the feature. Un-Checked items are hidden. You may need to resize the game displays after changing these items. Click
View -- Refresh
to put these changes into effect. The
Check All
button checks all checkboxes and
Check None
clears all checkmarks.
Notes:
1) Delay Time and Delay Progress bar are only made visible when the time period uses delay time. If
Show Delay
is unchecked, delay time will not be shown regardless.
2) The configuration of some Game Types when loaded will automatically hide one or more Score Indicators such as Moves, Passes and Penalties. See
Edit -- Game Type Attributes -- General Settings
after loading a new Game Type to see which Score Indicators are supported for the game.
Layout Features: Border and Padding

Windows creates a border around the game display window in additon to the Game Display border. When the game display Title bar is hidden, the Windows border is hidden as well.
Layout Features: Center Alignment of Controls
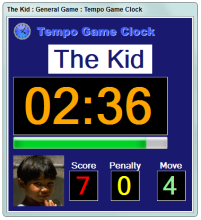
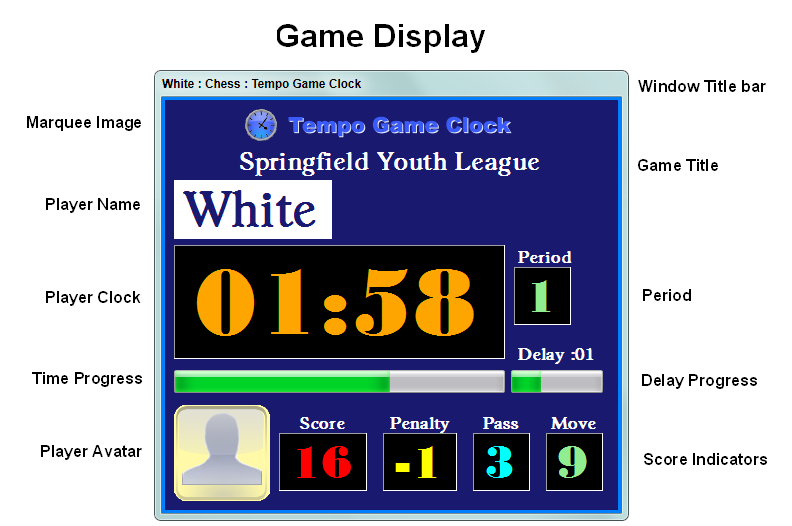
You can set the alignment of five horizontal rows on the Game Display. For example, in Figure 2., Player Name is Centered and all other rows are Left Aligned. Check the item's checkbox to Center align the row (See Figure 3.). Un-Check the item's checkbox to Left Align the row. The rows include (from top to bottom, reference Figure 4.):
- Marquee Image
- Game Title
- Player Name
- Clock Row - Includes Player Clock, Period Indicator, Delay Time and Time Progress bars.
- Avatar Row - Includes Avatar image and score indicators.
Auto Positioning of Game Displays
You can auto position the game displays on the computer display via View -- Auto Position Game Displays . See View Menu functions for a discussion of Auto Positioning. These options control rules for auto positioning Game Displays. All values are in in screen display pixels.
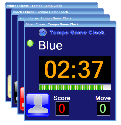
- Cascade offsets - These values control amount of Horizontal and Vertical offset space between each game display when Cascade positioning is used. (See Figure 6.)
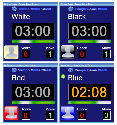
- Tile spacing - These value control amount of Horizontal and Vertical space between each game display when Tile positioning is used. (See Figure 5)
- Tile number per row - These value controls the number of game displays to add to each row when Tile positioning is used. For example, if there are 4 players and this value is set to "2". When you Tile the displays, it will produce 2 rows with 2 game displays in each row. (See Figure 5)
 Page Bottom
 To Page Top