Video Mill : User's Guide
 Contents
 Language
 Product Home
Video Dimensions - Video Geometry
 Page Bottom
Video Geometry Controls
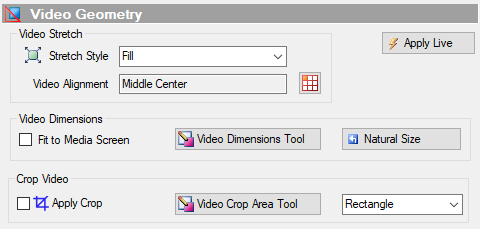
Show or Hide this section of controls by clicking the associated button on the Show Controls Sections Toolbar
Video Geometry settings determine how the video is rendered inside the Media Screen.
 To Page Top
About Video Dimensions
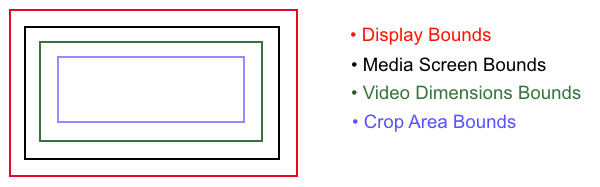
Video Dimensions defines how the video is sized and located within the bounds of the Media Screen.
Fit to Media Screen
When the Fit to Media Screen checkbox (Figure 1) is checked, the video will be sized to fit the dimensions of the Media Screen. When unchecked, the video is sized to the Media Screen Dimensions you define with the Video Dimensions Tool .
Natural Size
When the Natural Size button (Figure 1) is clicked, the video be sized to the Natural Video Size (original recorded video size in pixels).
Apply Live button
Video Zoom
You can Zoom-in on a video using the Video Dimensions Tool . From the tool bar, click Set Width > Set Width & Height in Percent . Then enter a percent Zoom Factor (ex. 2.0 = 200% Zoom). You can then Pan the zoomed video (left, right, up, down) within the media screen by clicking on the video rectangle and dragging it. You can Zoom-out by entering a value less than 1.0.
It is recommended (but not required) that you turn Off Crop when zooming a video (uncheck the Apply Crop checkbox). Once you zoom-in on the video, the cropping may sometimes interfere with manual panning. If you are not going to pan manually, crop will work as designed. Closing and reloading the Media Screen will usually fix any problem caused by cropping with zoom.
Video Dimensions Tool
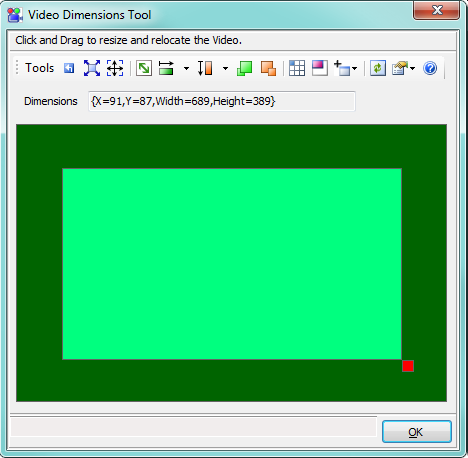
The Video Dimensions Tool (Figure 3) let's you change the size and and location of the video within the Media Screen.
Open the tool, by clicking the Video Dimensions Tool button (Figure 1). Click on the video box and drag it to relocate its position. To resize it, click on the resize handle (red square at the bottom, right corner of the shape) and drag it. There is a wide variety of sizing and locating functions available on the tool bar.
Tool bar functions
For details on what the tool bar functions do, see the Resize/Relocate Tool section.
Resize/Relocation Tools
Typical desktop organization when making adjustments to Crop Area size/location; Video size/location; and Media Screen size/location.
Tools in Figure 4 (left to right): Crop Area Tool, Video Dimensions Tool, Media Screen Dimensions Tool.