Video Mill : Knowledge Base
 Contents
 Language
 Product Home
Using VLC for Camera Streaming
 Page Bottom
Requirement
You want to stream video from a camera (video camera, camcorder, or Webcam) to a Media Screen in Video Mill. But your camera does not come with software to perform streaming.
 To Page Top
Solution
You can use third party software to facilitate streaming. VLC is a free package that we have tested and works. Or use your own favorite tool. First read the Streaming Cameras Essentials page for the basics. Then follow the instructions below to setup VLC to stream your camera. The VLC Forum is quite extensive with an active user community if you need help and want to ask the experts (see forum section VLC stream-output (sout) ) . The VLC Streaming features list is a good matrix that shows all the possible streaming combinations available for: video formats, muxer and transport protocols.
First Install VLC
- Download and Install VLC from the VLC Website. Install is very easy. Just run the installer exe.
VLC Streaming Setup
Steps for Streaming to a File
- Connect the camera to your computer.
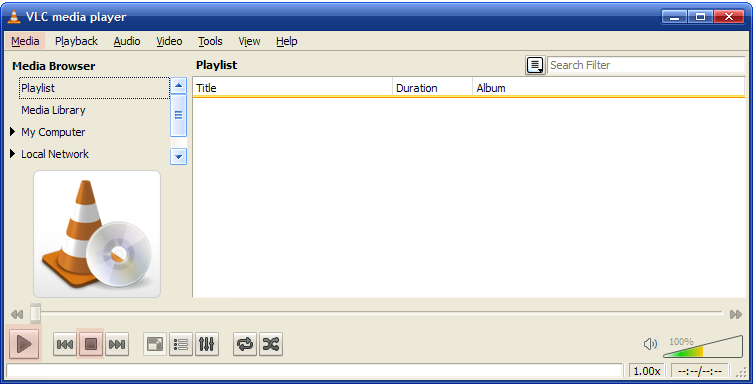
- Start VLC - Click the Start menu VLC icon.
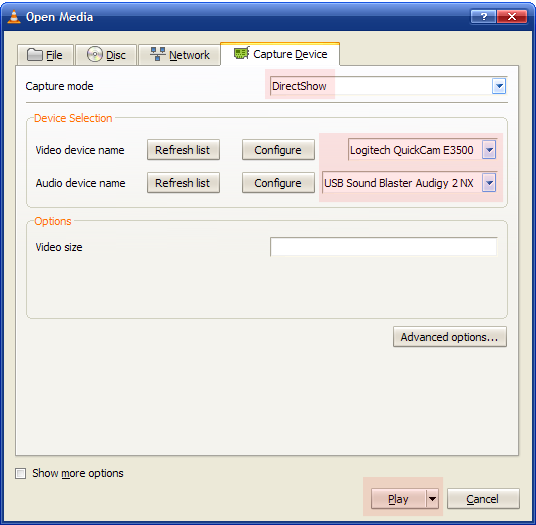
- Setup Streaming - Click Media -- Open Capture Device . (See Figure 4.)
- Capture Mode - Leave Capture Mode as DirectShow. (See Figure 1.)
- Select Devices - On the Capture Device tab (See Figure 1.), pick the Video Device Name and Audio Device Name (if you also want to use the sound).
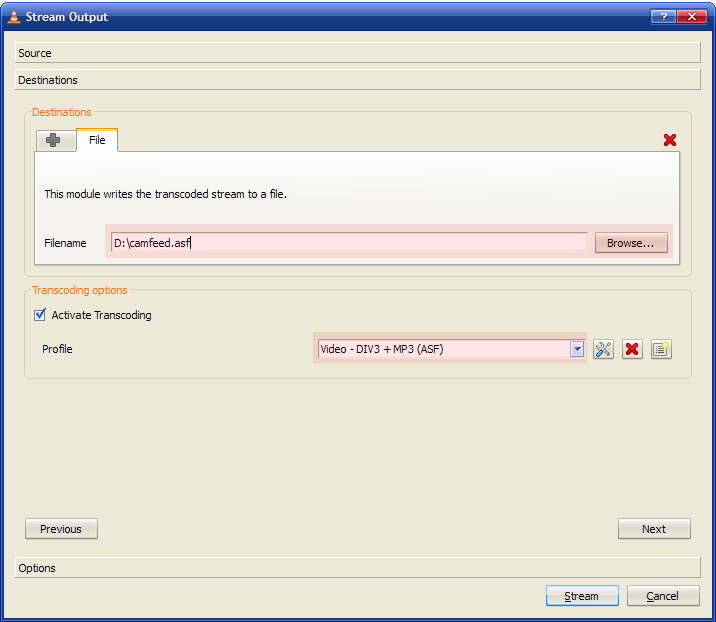
- Configure Stream - Now click the Down Arrow on the Play button and select Stream . (See Figure 1.) The Stream Output dialog (See Figure 2a.) will pop up.
- Output Source - Leave the Source as dshow:// and click the Next button (or click the Destinations section header ).
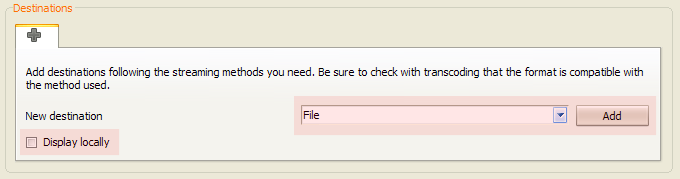
- Destinations - In the Destinations section (See Figure 2b.), select File from the New Destination dropdown. Then click the Add button.
- Display Locally - Do NOT check the Display Locally checkbox (See Figure 2b.) unless you want to display the stream in both the VLC Player as well as in a Video Mill Media Screen. Displaying in both incurs extra CPU processing, so this is a performance consideration.
- Enter Stream Filename (include drive letter and folder path) or click the Browse button to navigate to an existing file (See Figure 2a.) . This is the file that VLC will stream your camera output to. If the file already exists, it will be replaced when you start the stream.
- Select Transcoding Format from the Transcoding Profile dropdown (See Figure 2a.) . It MUST be one of the ASF options.
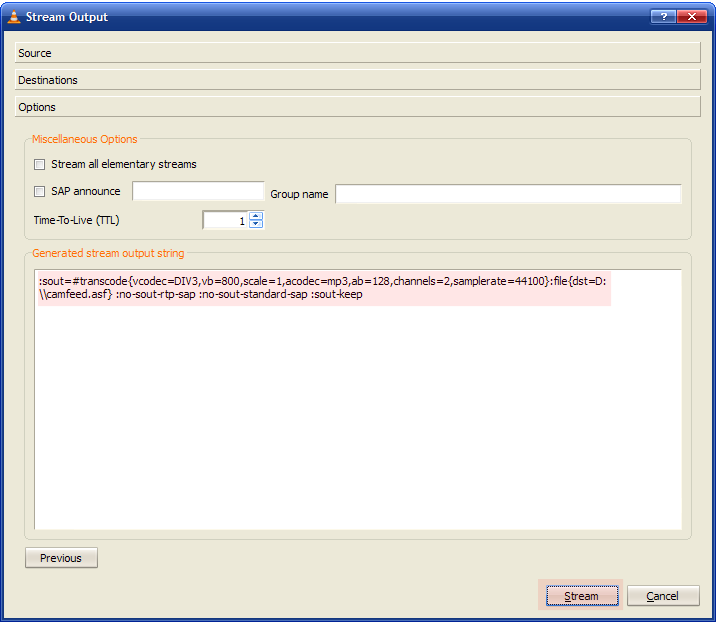
- View Generated Options - click the Next button to open the Options section (See Figure 3.) . If you save the Generated stream output string in a text file, the next time you run VLC, you can just paste this string into this textbox and save the configuration steps above.
- Start the Stream by clicking the Stream button.(See Figure 3.)
- Controlling the Stream - You can stop stream recording by clicking the Stop button at the bottom of the VLC Media Player. (See Figure 4.) This stops the recording of the camera stream. When you use a File as the stream Output Source, the file will continue to grow in size as long as you are streaming. If you are space constrained on your hard disk, this can be an important consideration.
Steps for Streaming to HTTP
Using a transport protocol like HTTP for streaming is nearly identical to the File approach above. In the Destinations section (See Figure 2b.), select HTTP (or other protocol) from the
New Destination
dropdown. Then click the
Add
button. On the resulting HTTP tab enter a
Port
number if the device requires a specific port or leave the default as 8080. In the
Path
textbox, a filename (ex. /camfeed.asf ).
Other protocols should work (ex, RTSP, MMS, etc), however, see why HTTP is the recommended over other protocols when you have a choice.
Video Mill Streaming Setup
Now the camera is streaming to the file you have specified above. So switching over to Video Mill, we are ready to accept the stream. See the User's Guide Descriptors section for details of the steps described below.
Steps for Playing Stream from File
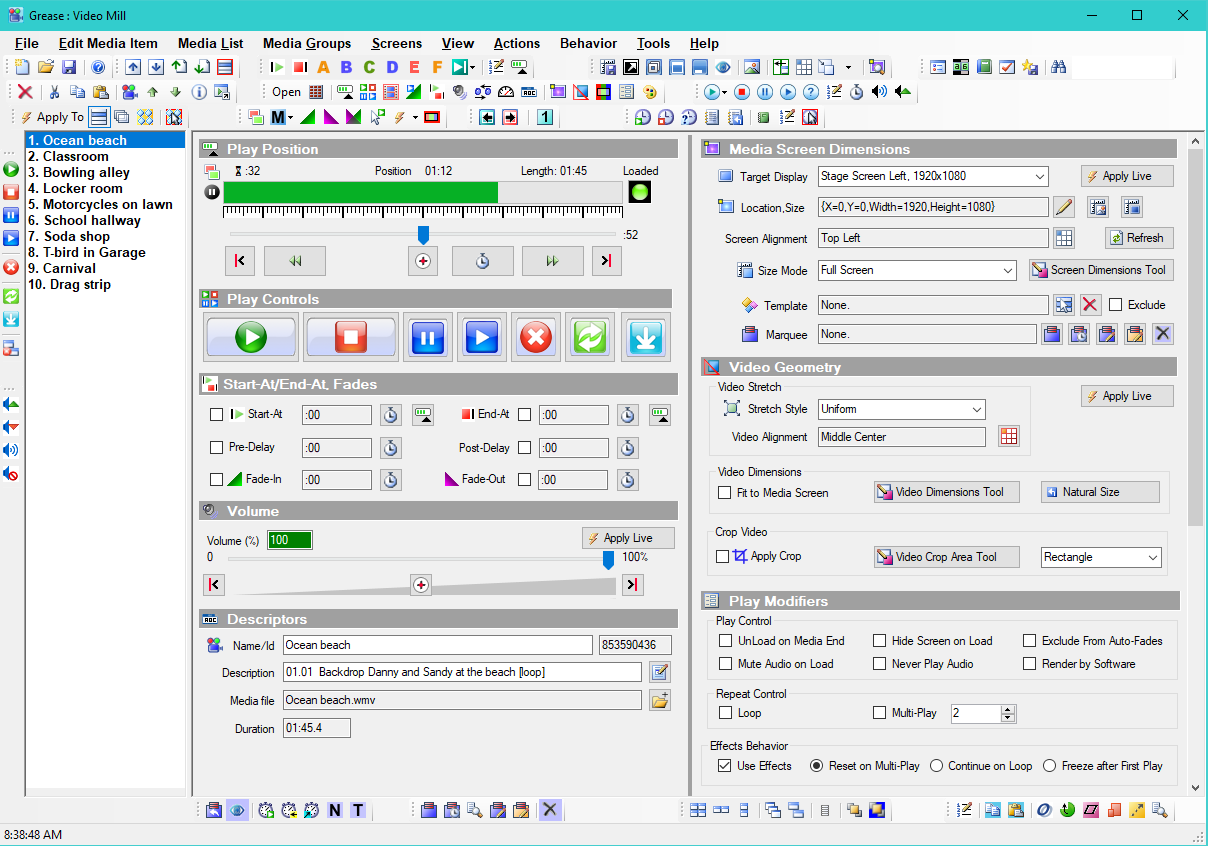
- Create the Media Item Create a new blank Media Item in Video Mill. Use the Media File Browse button in the Descriptors section to select a hard disk ASF streaming file. (See Figure 5.) This step should normally be done before you start the streaming in VLC.
- Load the Media Screen for this Media Item with the Load button. The stream may take some seconds to load (possibly 15-30 seconds so be patient).
- Play - Click the Play button to begin playing the stream in the Video Mill Media Screen.
- Pause - Pause button will only pause the playback of the stream. While you are paused in Video Mill, VLC will continue to record the stream.
- Stop - The Stop button will only stop the playback of the stream in Video Mill. It will not stop stream recording in VLC.
Steps for Playing Stream from HTTP
If you chose to stream to HTTP rather than a File,
using a transport protocol like HTTP for streaming is nearly identical to the File approach above. But instead of Browsing to a file on the hard disk, use the
Web Link
button on the Media Item and enter the link using your local computer IP Address as the server (read IP Address Note below). (ex. http://192.168.1.1/camfeed.asf )
IP Address Note: To find the IP Address of your computer, open a Windows Command Prompt window and type IPCONFIG /ALL . In the resulting output, look for the network card and find the IP Address (usually something like 192.168.1.1).