
 Video Mill : Knowledge Base
 Contents
 Language
 Product Home
Display Management in Windows
 Page Bottom
How to Extend Displays on the Windows Desktop
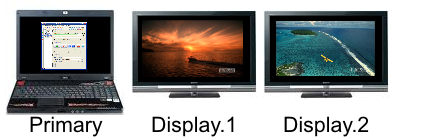
To project your video onto a Extended monitor, first connect the device (TV monitor, video projector device, etc.) to your computer via the video connector (ex. VGA, DVI, S-video, HDMI, or other connector). Then Extend the Windows Desktop as described below. After you Extend Displays, you'll be able to place Media Screens onto the Extended monitor(s).
Moving your hardware to another location
If you move the displays to another location/room, try to always connect each display to the same hardware connector port (HDMI port). VideoMill identifies displays by a combination of Display model/resolution AND HDMI port number. If you swap displays to different ports, you will likely have to change the Media Item Target Displays so videos get played on the correct screens.
Extend Desktop Setup - Windows 10/8/7/Vista
- Connect the physical displays to the hardware connector ports (HDMI, etc) before extending the Desktop.
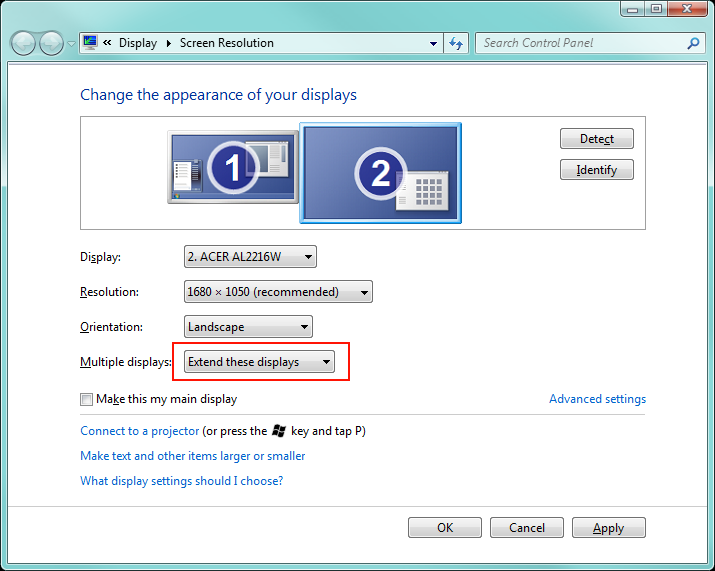
- Right-mouse-click the Windows Desktop, and then click Screen Resolution (Win 7/8) or Display Settings (Win10).
- In the Screen Resolution dialog box (Figure 2 or 3), pick Extend these displays from the Multiple Displays pulldown.
- Then Click Apply or OK.
 To Page Top
Windows Display Settings (Scale Factor and Resolution)
Verify Display Scale And Layout Settings (one time setup)
- Once the displays are extended on the Desktop(above), you should verify that each display has the correct settings.
- Mouse Click on each display (one at a time) to highlight it (Figure 2) and verify that the Scale Factor and Resolution are correct for that display.
- Scale Factor - Set the Scale Factor to 100%.
- Resolution - Set the Resolution to the highest physical resolution for the display (for 4K display = 3840 x 2160).
Important - If Scale Factor and Resolution are not set as above, it is likely that the video will play at an unexpected size (too small or too large so it bleeds onto another display). See "Scaled Display Size Considerations" section below if you need to scale it.
Changing the Primary Display
In most cases, you will want your laptop display to be the Primary Display, but you can set any extended display as the Primary. Select a Display in the panel at the top of the dialog box (Figure 2 or 3). Then check the Make this my main display checkbox, to make it your Primary Display. All other displays will now be recognized as Extended Displays by Video Mill.
Changing Extended Displays Designations
You can drag the Displays to a new position in the extension order with your mouse. Positional placement of the displays is irrelevant to VideoMill unless you are creating a video wall where videos will be stretched across two or more displays.

4K Display Issues Diagnosis
If a 4K display is not working (no video or wrong size video), check these items.
- Is the 4K display Extended On The Windows Desktop (see above).
- Did you verify/set Display Scale And Layout Settings (Scale Factor and Resolution, see above).
- Are HDMI cable display connectors seated properly?
- Are the HDMI cables capable of 4K? You need cables that certified for 4K UltraHD HDR. Standard HDMI cables generally will only support 1080p or 720p feeds.
- Is the graphics card and/or computer capable of 4K? One or the other may need a device driver update (check the manufacturer's website for latest driver download version). Most computers and graphics cards made around 2018 or later will most likely support 4K. Typically, 4K Resolution (3840 x 2160) in the Scale And Layout Settings will not be available if these hardware components are not 4K capable, although a driver update may fix it.
Identifying Displays in Video Mill
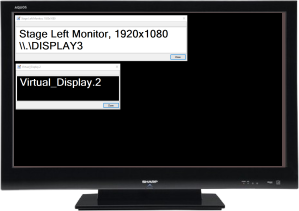
After extending displays, you can determine how each display is identified by Video Mill by clicking Media List Editor > Tools > Displays > Identify Displays > Show Identifiers . A popup on each physical display will show the Video Mill identifier (Figure 4). Video Mill Virtual Display ids will also be shown (if you are using them).
Windows assigns a number to each connected display as shown in Figure 3 or 3. Video Mill acquires display designations from Windows in this format: "\\.\DISPLAY1, \\.\DISPLAY2, ...". The VideoMill "\\.\DISPLAY2" id may or may not map to display #2 shown in Figure 3 or 3. Unfortunately, Windows does not expose its display numbers to applications.
Scaled Display Size Considerations
Recommendation
Avoid scaling display size if possible. Leave the display scaled to 100% of its native resolution. Scaling makes managing displays with Video Mill a bit more complex and will lower the rendered resolution quality of a video.
Symptom
You may see a strange resolution size for a display reported by Video Mill. For example, a 1920x1080 display may be reported by Video Mill with an Applied Size of 1280x720. That is a good indicator that the display was probably scaled in the Windows Display Settings.
How to Change Display Scale
Windows allows you to scale the size of a display (to 125%, 150%, etc), effectively changing the resolution of the display. You do this in the Windows Display Settings using the Change the size of text, apps and other items pulldown menu (Figure 2). Users often use display scaling on high resolution displays (ex 4K, 3840x2160) to scale program user interfaces to a usable size.
Windows High-DPI Scaling
Display Scaling depends on High-DPI* Scaling which is a work in progress for Windows. This Microsoft blog post explains the current state of High-DPI Scaling in Windows 10 (April 2017). Older Windows OS versions (Vista/7/8) have lesser levels support for High-DPI Scaling. If you are going to be using Display Scaling, it is best to move to Windows 10 where there is ongoing work to improve it.
* DPI: dots per inch.
Windows 10 vs 7/8
There is big difference between these Windows versions with respect to scaled displays. Beginning with Windows 10 Anniversary Update (August 2016) and improved with Creators Update (April 2017), Windows 10 allows for individual scaled displays. In prior Windows versions (Vista/7/8), if you scale one display, all other displays are scaled as well. This includes scaling your laptop display where you may be viewing application program windows.
Video Mill with Scaled Displays
If you scale a display's size, Windows will report a different Applied Size (effective resolution) to Video Mill. For example, if you scale a 1920x1080 display by 150%, Windows will report an Applied Size of {Width=1280, Height=720}. This Applied Size multiplied by 1.5 (150%) equals the original, native display resolution. To comply with Windows High-DPI Scaling, Video Mill uses the display Applied Size to do its calculations.
Bottom Line
The most important issue is that a video played on a scaled display will render the video at the resolution of the display's Applied Size (not its native resolution). To use the above scaled display example, a 1080p video played Full Screen will render at 720p resolution on that scaled (150%) display. And if a 1080p video is played at Natural Video Size (1080p), it will stretch off of the display. These issues are unavoidable given the Windows technologies used by Video Mill. So on a scaled display, the best you will achieve is lower resolution viewing at full screen.
Hiding the Taskbar on Extended Displays
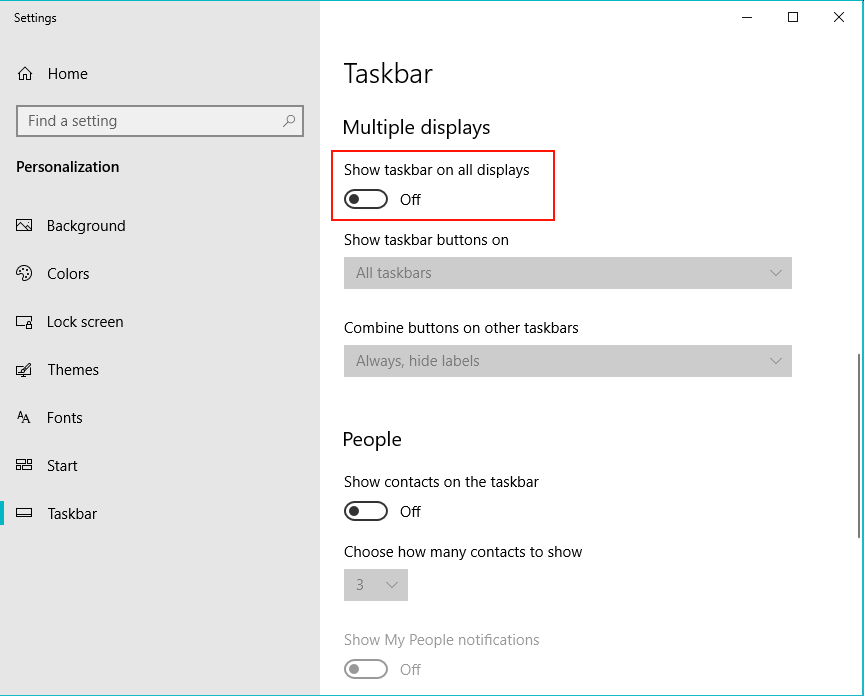
To prevent showing the Windows Taskbar on the extended displays, right-mouse-click on the Windows Taskbar, then Pick Taskbar Settings (or Properties). In the Taskbar Settings dialog, un-check (turn off)) the "Show taskbar on all displays" checkbox (Figure 5).
Select the Background on Extended Displays
You set the Windows Background in the Windows Settings > Personalization Settings > Background. By default, Windows will extend you Desktop Background image onto extended displays. If you want to avoid that there are two options (that we know of).
- Set your Windows Background to a Solid Color (ex black). All extended displays will use that as a background.
- You can set a Background image for each display. First extended the displays. Go to Personalization Settings > Background. Under Choose Your Picture, all the images that you have loaded for Backgrounds are shown. You may have to Browse to load the image you want. Right mouse-click on an image and a context menu will appear to allow you to select which monitor you want to apply the image to. If you just want a solid color for that display, create an image that is just a solid color.